|
SPRING & SUMMER GARDENING:
Spring Gardening Chore Checklist - View
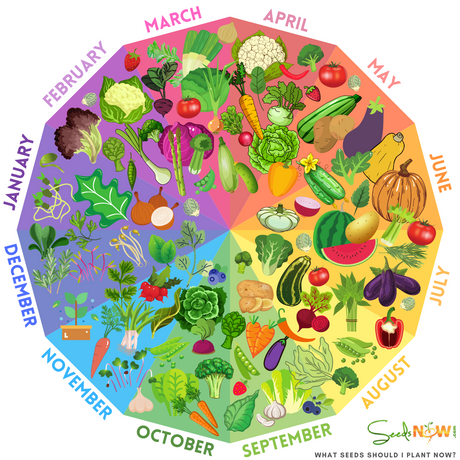
Herbs & Veggies to Plant NOW for a Summer Garden - View
Heat Loving Veggies & Herbs You Can Grow RIGHT NOW in Summer! - View
12 Plants That You Can Grow This Summer To DETER Mosquitoes - View
Have a Better Summer Garden With These 7 Tips! - View
FALL & WINTER GARDENING:
5 Fall Vegetables Worth Growing In Containers This Year - View
Grow a Fall/Winter Harvest - Plant these seeds in July/August - View
Planting a Fall Garden. Step-by-Step - View
How to Store Vegetables for Winter - View
10 Vegetables You Can Over-Winterize - View
19 Frost Hardy Vegetables to Plant this Fall - View
Fall and Winter Gardening Made Easy - View
16 Crops To Plant NOW for Fall! - View
15 Vegetables You Should Be Planting NOW for a Fall Harvest - View
Tips for Starting Your First Fall Garden & 19 Crops That Can Withstand Freezing (or almost freezing) Temperatures! - View
Gardening Chores for January - View
Our TOP 10 Favorite Fall & Winter Gardening YouTube Videos! - View
19 Crops You Should Try Growing This Fall or Winter - View
TOP 9 QUICK GROWING CROPS FOR FALL & WINTER - View
It's Winter! What to do in the garden now?! - View
Most Popular Seeds to Plant Now for Fall/Winter Gardening - View
SEED STARTING:
6 Tips That Every NEW Gardener Should Know - View
Tips for Successfully Starting Your Seeds Indoors - View
Egg Carton Seed Trays - View
Use Muffin Tins To Start Your Seeds In! - View
How do I Know Which Seeds to Direct Sow and Which to Seeds to Start Indoors? - View
How to Get Better Germination From Your Seeds - View
9 Steps to Harden Off Seedlings - View
7 Tips For Using Rockwool To Start Your Seeds - View
Are you starting enough seeds? - View
What's the proper way to thin seedlings? 🌱 🌱 - View
Seed Planting & Spacing Cheat Sheet - View
WAIT! Don't start these seeds indoors yet! - View
OK! It's time to start these seeds indoors NOW! - View
RAISED BED GARDENING:
Tips on Building Perfect Raised Beds! - View
How to make a Hugelkultur Bed & What the heck is a Hugelkultur? - View
Great Materials For Making Raised Beds! - View
Build The Benefits of Raised Beds - View
How To Plant a Straw/Hay Bale Raised Bed - View
CONTAINER GARDENING:
5 Simple TIPS to Growing Herbs in Containers - View
6 Tips for Gardening in Containers - View
9 of The Best Vegetables to Grow in Small Gardens - View
5 Fantastic Tips for Watering Your Container Garden - View
Small Space Gardening Ideas For Your Boat or RV - View
RANDOM POSTS:
Why You Should Join a Community Garden - View
Inspirational Gardening Quotes! - View
How To Make A Bean Teepee - View
How to Build a Vine Tee-Pee - View
How To Grow & Care For Your Strawberry Plants - View
How to Grow Perfect Parsnips - View
How Do You Cure Potatoes? - View
How To Tell When An Eggplant Is Ripe - View
Everything You Ever Wanted To Know About Squash Blossoms - View
4 Easy Steps to Dry & Cure the Small Ornamental Gourds You Grew! - View
8 Gardening Hacks You Need to Know - View
Tips for Growing More Food Indoors, All-Year-Long! - View
Everything you need to know about gardening through all the seasons - View
14 Green Fruits and Vegetables You Should Be Eating - View
How to Use a Mason Jar as a Cloche - View
Are You a First Time Gardener? Start Here! - View
5 Season Extension Techniques for Year-Round Gardening - View
32 Edible Perennials (or plants that can ACT like Perennials!) - View
How to Grow Your Own Salsa Garden - View
How To Make a Pizza Garden - View
How To Successfully Plant a Straw/Hay Bale Garden - View
The Secret to Building a Salad Keyhole Garden - View
SPROUTS & MICRO-GREENS:
How to Grow Sprouts at Home *Without Soil* - View
How to Sprout Wheat Berries at Home in a Mason Jar - View
How to Grow Sprouts Easily at Home Using a Mason Jar-View
Micro-greens! The Benefits are anything but MICRO! - View
ANIMALS & PETS:
What to Plant for a Pet Friendly Garden - View
Which Plants Do Bunnies, Cats, Dogs, and Chickens Like to Eat? - View
How To Supplement Your Animal Feed by Growing Fodder at Home - View
WATERING:
Ways To Conserve Water in Your Vegetable Garden - View
8 Tips on How to Water More Efficiently - View
COMPOST, MULCH, & SOIL AMENDMENTS:
Composting DO's and DON'Ts - View
18 Things You Should Never Compost - View
Your Vegetables Like Coffee, Just As Much As You Do! - View
How to Use Coffee Grounds In Your Garden - View
How to Use Eggshells in Your Garden - View
How To Use Seaweed In Your Garden - View
|
PESTS & PROBLEMS // GARDEN CONTROL:
Common Gardening Problems & How to Cure Them - View
How To Attract Beneficial Ladybugs Into Your Garden - View
Common Problems In the Garden and How To Fix Them! - View
3 Ways to Kill Weeds Naturally & Quickly - View
Learn How to Recognize and Prevent Mosaic Virus in Your Garden - View
4 Trap Plants You Should Be Growing To Help Deter Pests - View
8 Ways To Get Rid of Garden Pests (Without Any Chemicals!) - View
Natural Pest Control Methods - View
HELP! My Plants are Tall, Thin, and Leggy. What should I do? - View
How to Control Powdery Mildew, the Easy Way! - View
Plant THESE To Attract More BEES! - View
15 Plants That Repel Mosquitoes - View
Plants That Naturally Repel Mosquitoes - View
Use Beer To Kill Slugs - View
BEER = An Effective Method for Slug Control [Who Knew!?] - View
Why Won't My Root Veggies Grow? - View
How do You Use Epsom Salts to Fertilize Your Plants? - View
FLOWERS // HERBS // POLLINATORS:
Treat Your Ailments Naturally With Homegrown Herbs - View
15 Herbs You Can Grow at Home To Make Your Own Tea - View
10 MUST GROW Plants for Herbal Tea Lovers - View
How to Grow an Indoor Herb Garden - View
Top 4 Air Purifying Herbs You Can Grow Indoors - View
11 Easy To Grow Medicinal Herbs - View
Healing Herbs That Anyone Can Grow at Home - View
Top 6 Culinary Herbs You Never Knew You Could Grow Indoors, During Winter! - View
27 Plants That Produce Edible Flowers - View
38 Edible Flowers To Plant In Your Garden - View
PRO Tips for Growing Wildflowers Successfully - View
How to Grow Beautiful and Healthy Sunflowers - View
Save the Bees! Plant a "Bee-Friendly" Garden Today! - View
LETTUCE, SALAD, & LEAFY GREENS:
7 Tips and Tricks for {Fresh} Lettuce {Longer} - View
How to Grow a "Cut and Come Again" Salad Bar Garden - View
Make Ahead "Salad in a Jar”- View
The Secret to Building a Salad Keyhole Garden - View
PEPPERS:
How Hot Will My Peppers Be? Scoville Scale Heat-Ranking for Hot Peppers! - View
Tips on How To Successfully Germinate Hot Pepper Seeds -View
15 Super HOT Varieties Every Pepper Enthusiast Must Try! - View
Tips for Germinating HOT & SWEET Pepper Seeds - View
TOMATOES:
4 Ways to Ripen Green Tomatoes - View
Tips for Controlling Tomato Hornworms - View
How to Plant Tomatoes the Right Way - View
How to Make Pickled Tomatoes, In Just 5 Minutes - View
Spank Your Tomatoes! -Get More Fruit on Every Plant- - View
14 Companion Plants to Grow With Your Tomatoes! - View
GREENHOUSE:
Tips for Growing Better in a Greenhouse - View
HOOP HOUSE:
How to Build a "Hoop House" for your Fall and Winter Gardening! - View
HYDROPONICS & TOWER GARDEN:
15 Lettuce & Leafy Greens You Should Try Growing Hydroponically - View
80 Plants You Can Grow with Vertical Towers and Hydroponic Garden System! - View
How to Plant a Vertical Tower Garden - View
These are the most popular ways to grow food, Vertically! - View
Aquaponics: Why It Works! - View
Make A Vertical Planter with Terracotta Pots - View
SHADE:
How to Grow Vegetables and Herbs in Partial Shade - View
Which Vegetables & Herbs Grow Best in Light - Partial Shady Gardens? - View
HEAT & DROUGHT:
Heat-Loving Varieties that Grow Great in the Southern States - View
33 Drought Tolerant Crops For Dry or Hot Climates - View
DIY PROJECTS:
How To Make Your Own Seed Tape - View
Make Ahead "Salad in a Jar”- View
Make a Tic Tac Toe Game For Your Garden - View
How to Make Watermelon Candy - View
[DIY] Honey-Lavender Luffa Gourd Soap - View
CANNING & PICKLING // RECIPES:
Everything You Need To Start Canning Your Homegrown Vegetables! - View
How Do I Can My Homegrown Vegetables? View
Best Crops to Grow For the Home Canner - View
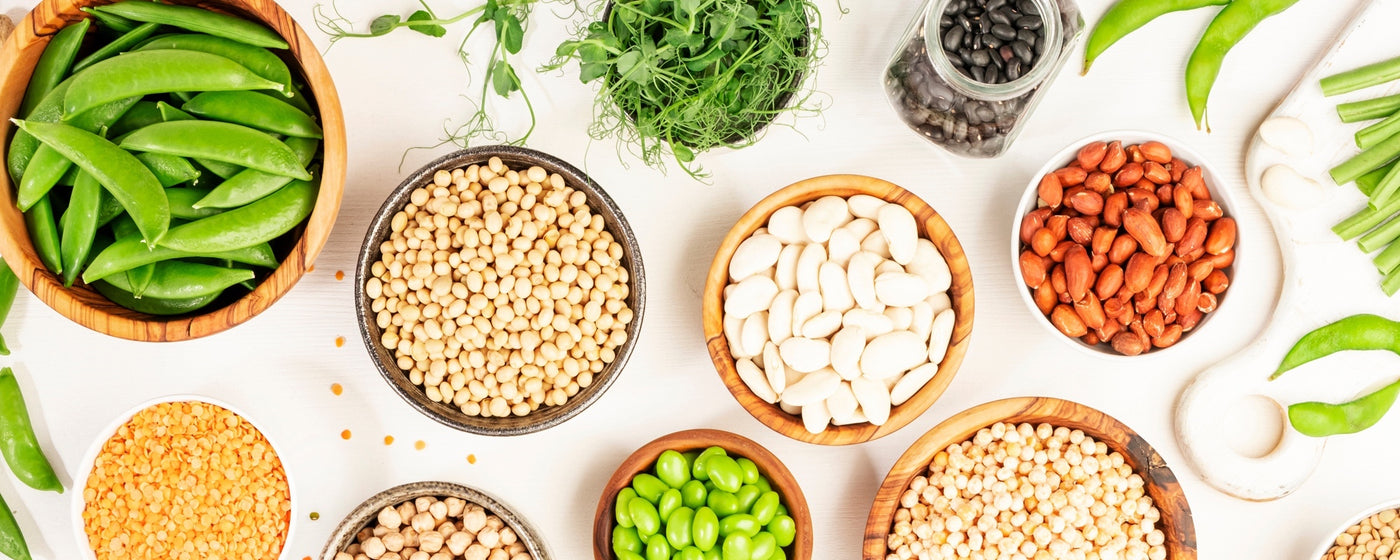
How to Grow & Pickle Homegrown Peas - View
Create Easy Pickled Radishes in Less Than 5 Minutes - View
Which Vegetables are Best to Ferment? - View
OTHER RECIPES:
This is how you make the best hummus dip! DIY Recipe - View
How To Make Amazing Zucchini Chips - View
How to Make a Stuffed Zucchini Crocodile - View
7 Awesome Mint Drink Recipes - View
How to Roast Garlic in the Oven - View
|